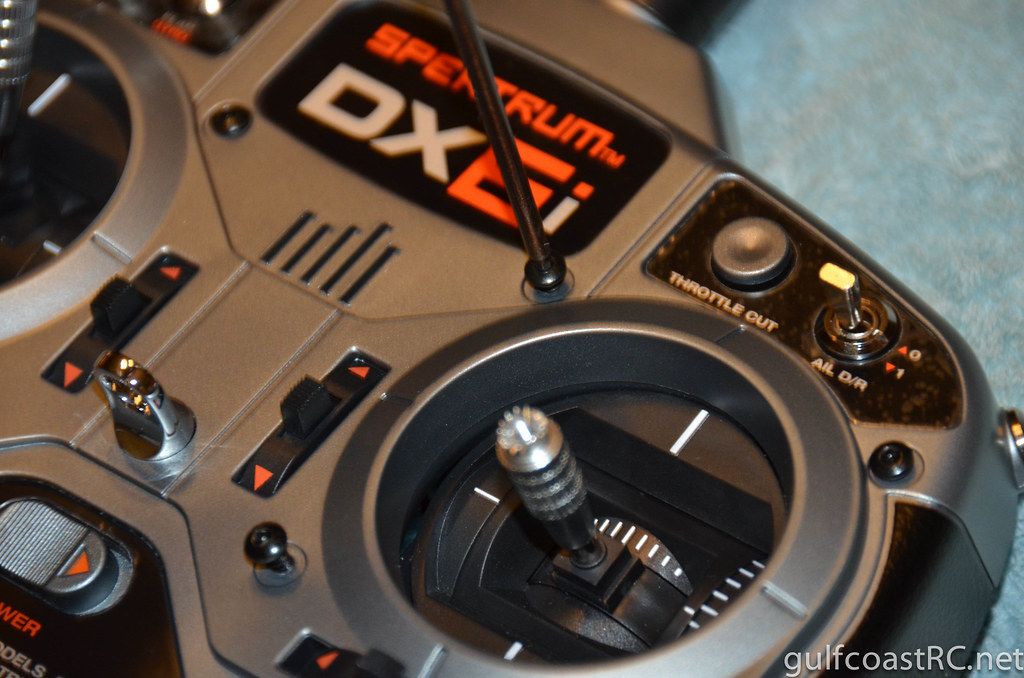
Spektrum DX6i Transmitter
The Spektrum DX6i Transmitter
When the sticks broke off my old Futaba 7 channel 72 MHz T6XA radio recently I was forced to upgraded to the 2.4 GHz radio system. Being a Mode 1 flyer as I have being since I began flying RC a way back in the 1960's and after having to make the mode conversion myself on countless radios in that time, I didn't give it a second thought when I found that there was no mode 1 option offered by the supplier when I ordered my new Spektrum radio.
I was somewhat discouraged, to say the least when I discovered that the manual that was supplied with the Spektrum system didn't even mention the possibility of changing stick modes.
Now thinking that there was no other option for me~~I would have to try once more to train myself to fly mode 2, knowing full well that I had tried that before on several occasions, and always with the same disastrous results. Each time that I had attempted to retrain, It had always ended the same way~~all would go well until something happened to cause me to panic and once panicked, I always reverted to my old ways (mode 1 flying)~~which was certainly not very useful for recovering from a panic situation, simultaneously applying low throttle and down elevator~~the exact opposite to what was called for in any panic situation.
For those of you who don't know the difference between mode 1 and mode 2 (Mode 2 being by far the most popular mode used in North America) this video should explain the difference between the two flying modes.
People who have read this post may be interested in reading this one.
The Solution:-
A search of the Internet turned up a lucky hit, a link to a site that gives a step by step procedure to not only change the mechanical components but, also the transmitters software.
Even though the instructions themselves are excellent and comprehensive, the mechanical part of the task is very difficult and near impossible to accomplish in my opinion. This is because of the necessity to remove the 3 pivot pins from the right stick assembly and move them over to the left stick.
Removing the pins was difficult enough but inserting them in the opposite stick was the impossible part of the process for me.
After several unsuccessful attempts at inserting the old pins I gave up and made new ones from 1.5 mm music wire. The new pins were made slightly shorter than the gap through which they were to be inserted and to aid with the insertion process they were made with tapered ends.
Final Results:-
Converting sticks is never an enjoyable experience but, in my opinion this was by far the most difficult of all the conversions I have made to date. After what seemed an endless struggle, I now have a brand new Mode 1 Spektrum DX6i of my very own..
Suggestion to radio manufacturers:-
It doesn't have to be this difficult to switch transmitter modes. If the sticks were identical the mechanical changes required to change mode would be limited to adjusting 4 screws to give the required settings for the appropriate mode. The tension adjusting screws already have a range of 0 to maximum force. The conversion effort for a mode 1 setup, if both sticks were identical would entail simply adjusting the screws on the right stick to give zero centering force and desired drag force for up and down motion and doing the opposite settings on the left stick.
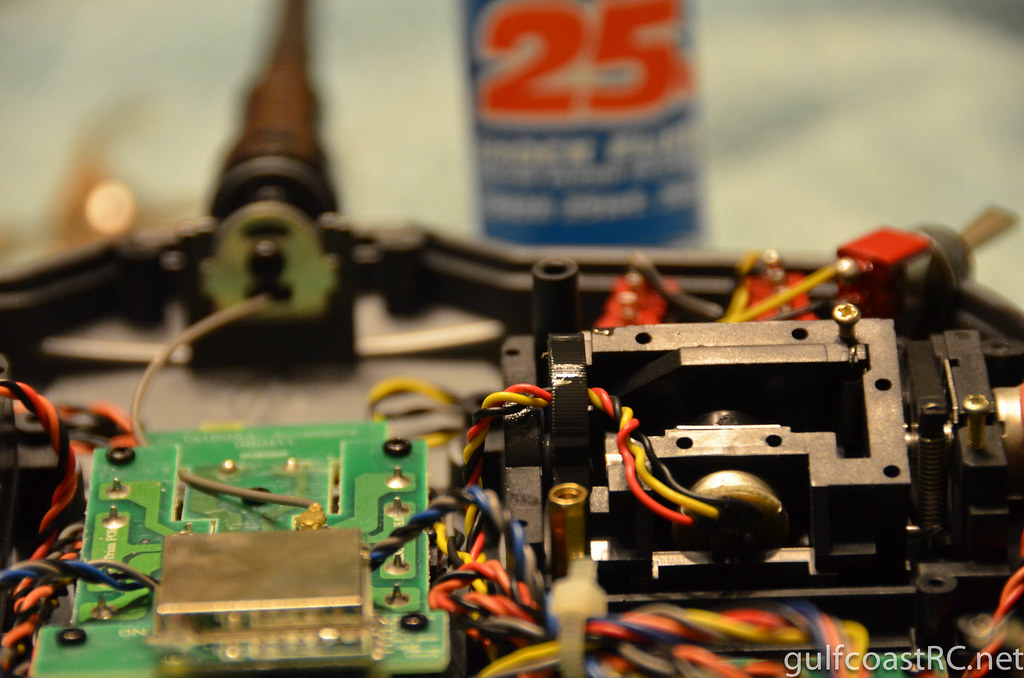
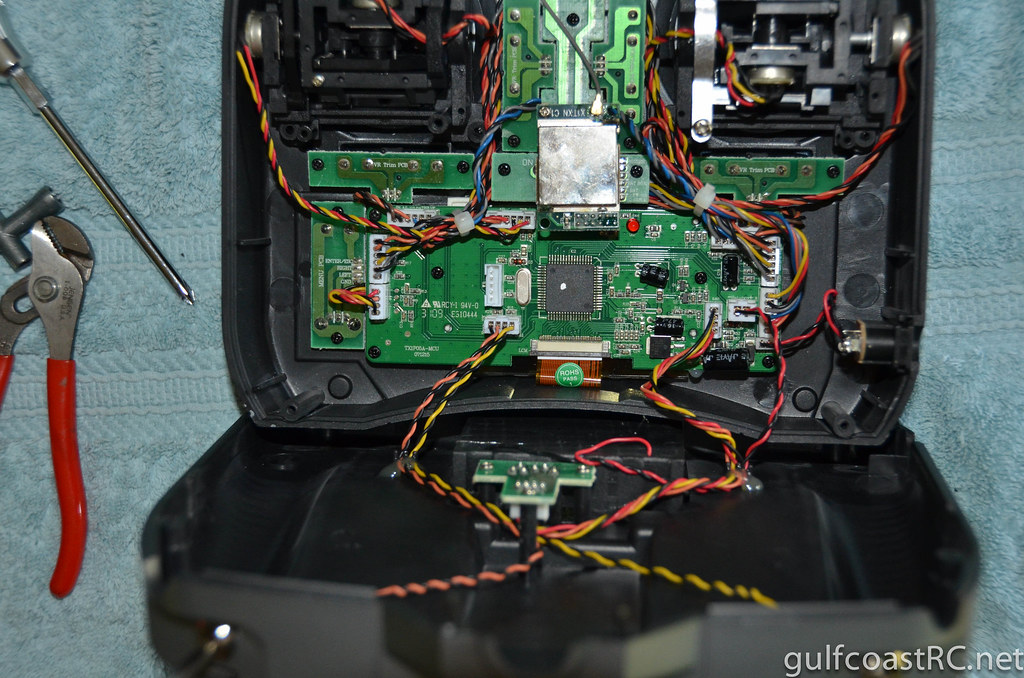
Remove the screws from the back and carefully separate the halves of the case.
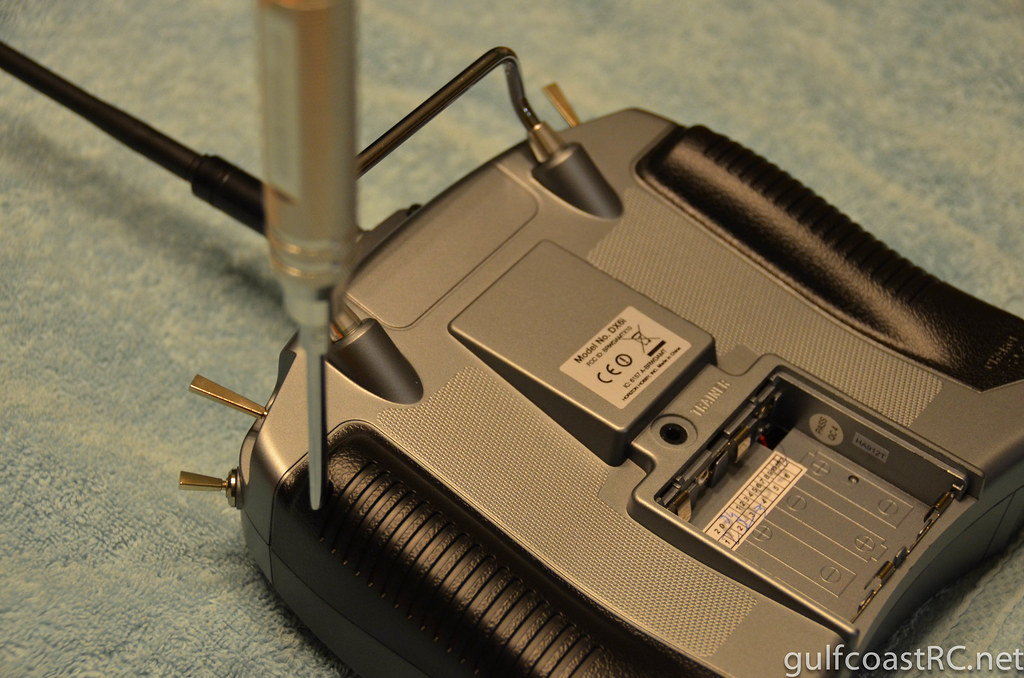
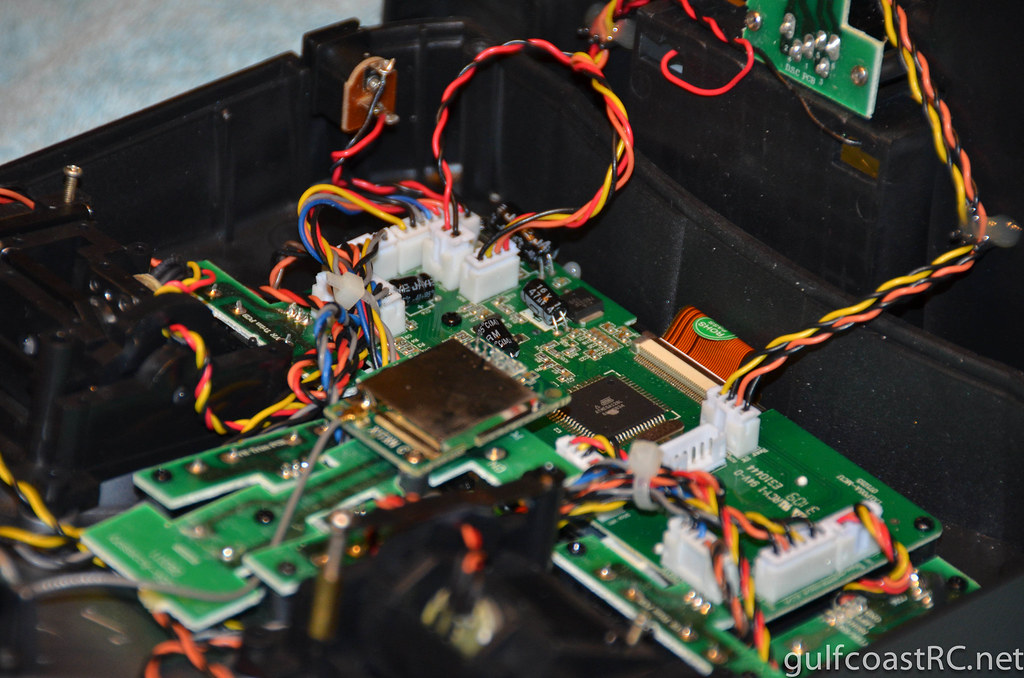
Three connectors connect the front half to the back half. I usually snap a photo to remember which connector goes to which lead.
Mark them or snap a reference photo of your own in case the color codes are different in your radio..
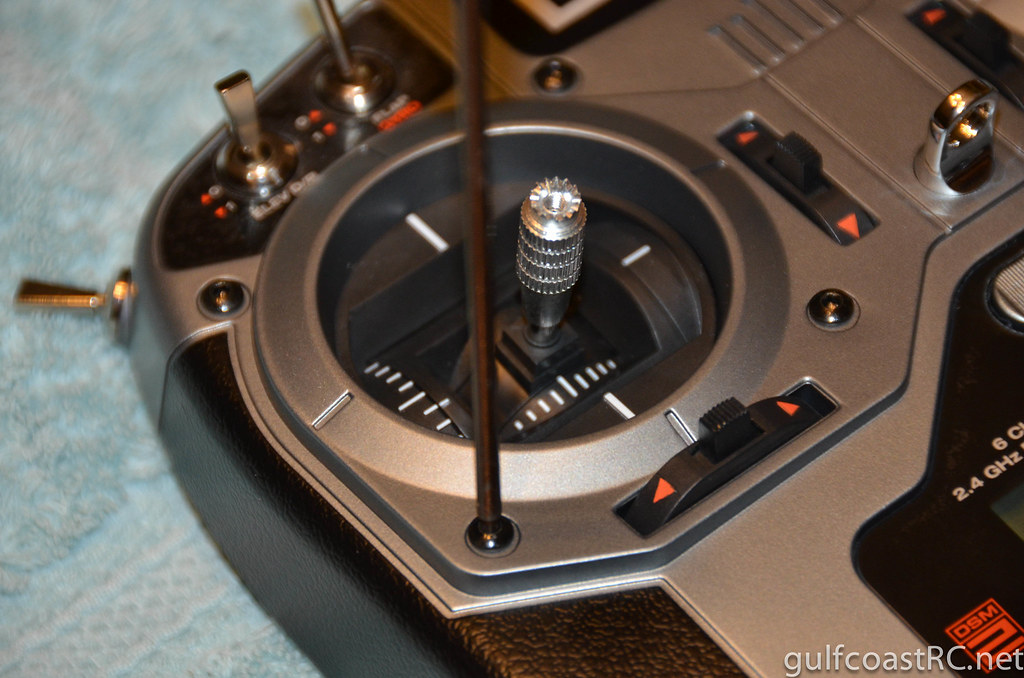
Remove the tension-er bar by unscrewing the two screws.
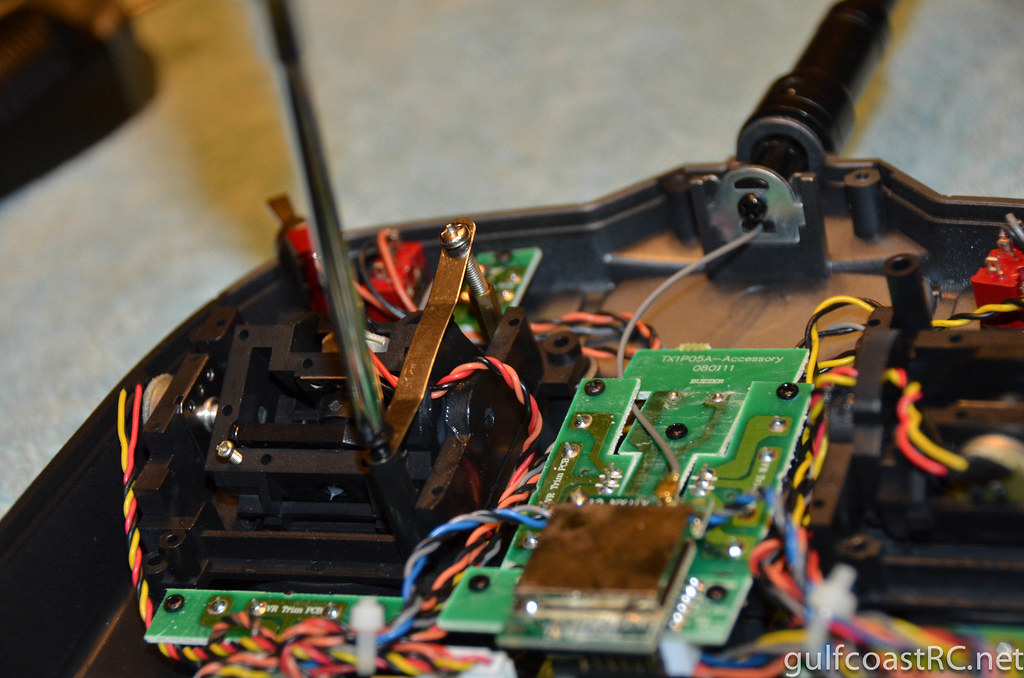
Beneath one of those screws was a tall-ish brass threaded nut (similar to a post on a motherboard). Remove it.
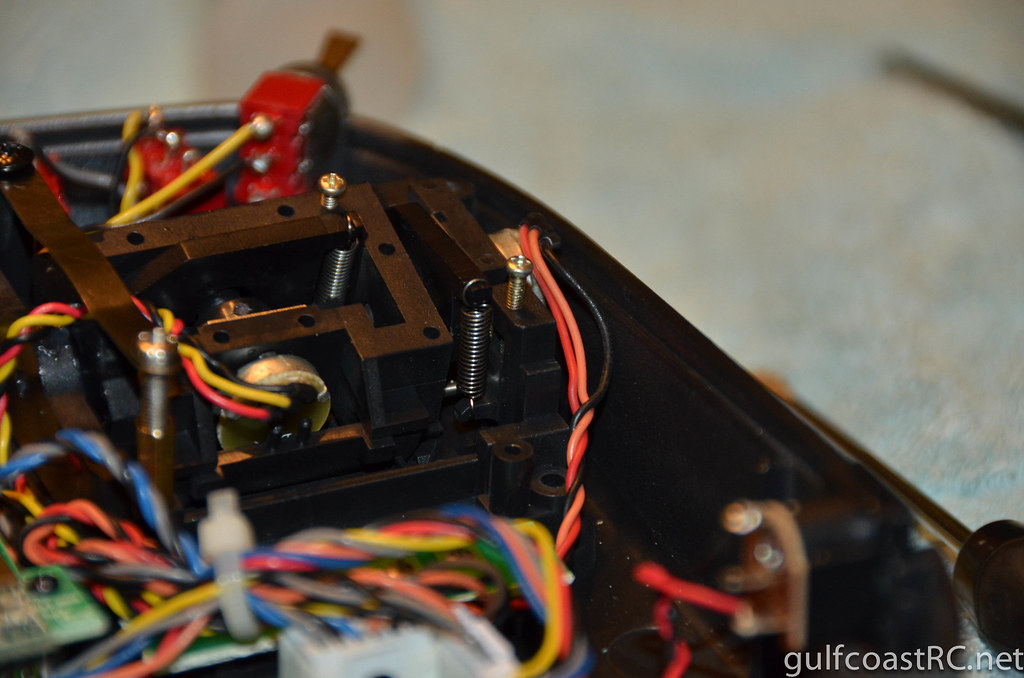
..and move the brass nut to the opposite - mirror side. In this case, looking at the radio, I moved it from top right portion of the stick on my left, to the bottom left hole of the stick on my right. This is a good time to apply some silicon oil (i used shock oil) to the plastic friction knob before putting the friction plate back on..
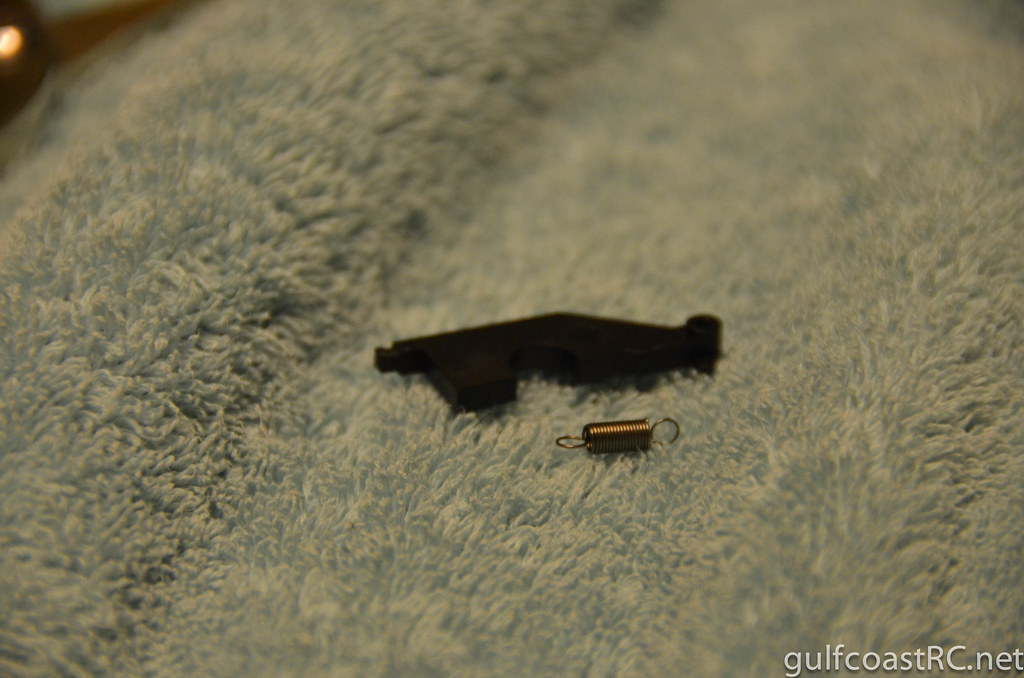
Go ahead and put the tension bar back on. Screw the black screw all/most of the way in. The silver screw that goes into the brass post, you will adjust to feel, we'll adjust it later.. See that spring in this picture? Remove it. I had luck getting tweezers in on pulling it off the bar it's connected to. Don't loose it. Where would you find another ? :)
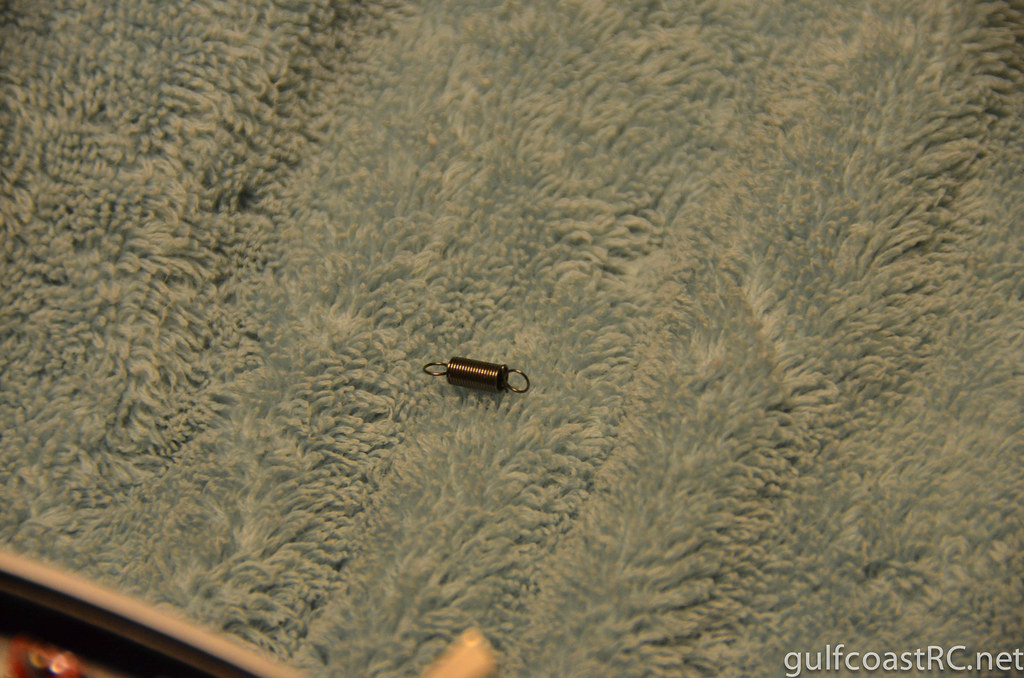
Set the spring aside..
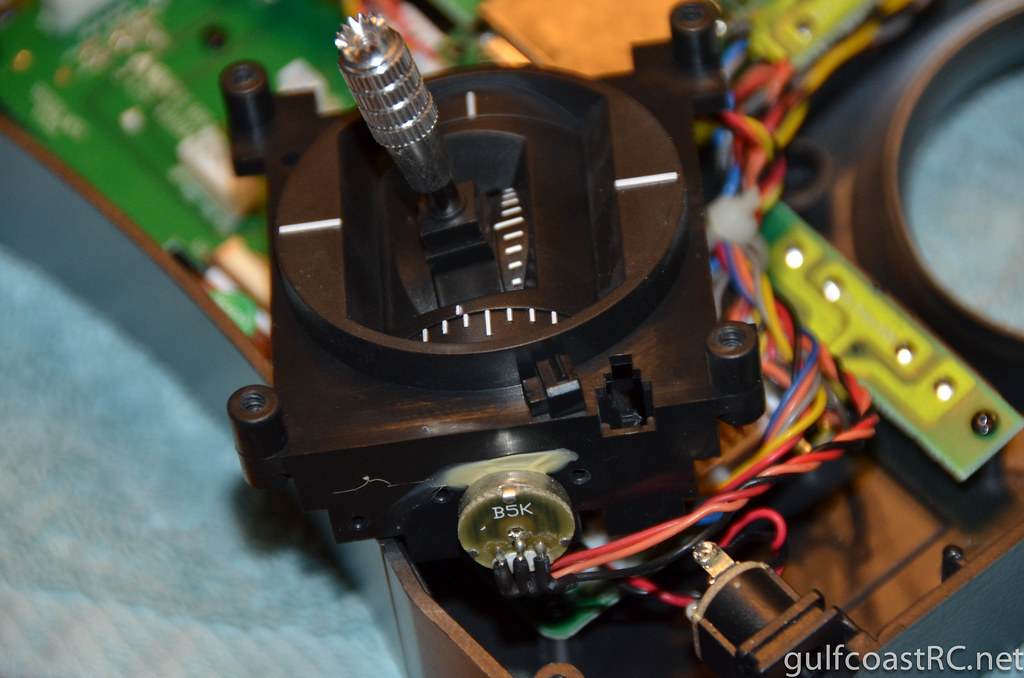
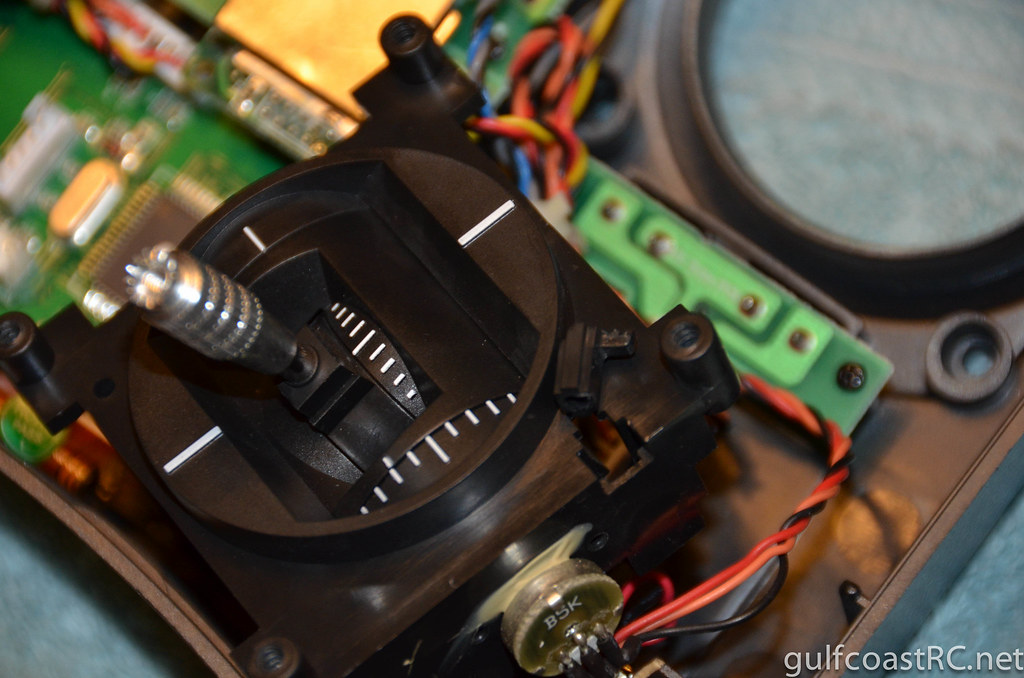
Now, remove the bracket that the spring was attached to by pushing it gently off the pin that holds it as shown here:
Set it aside..
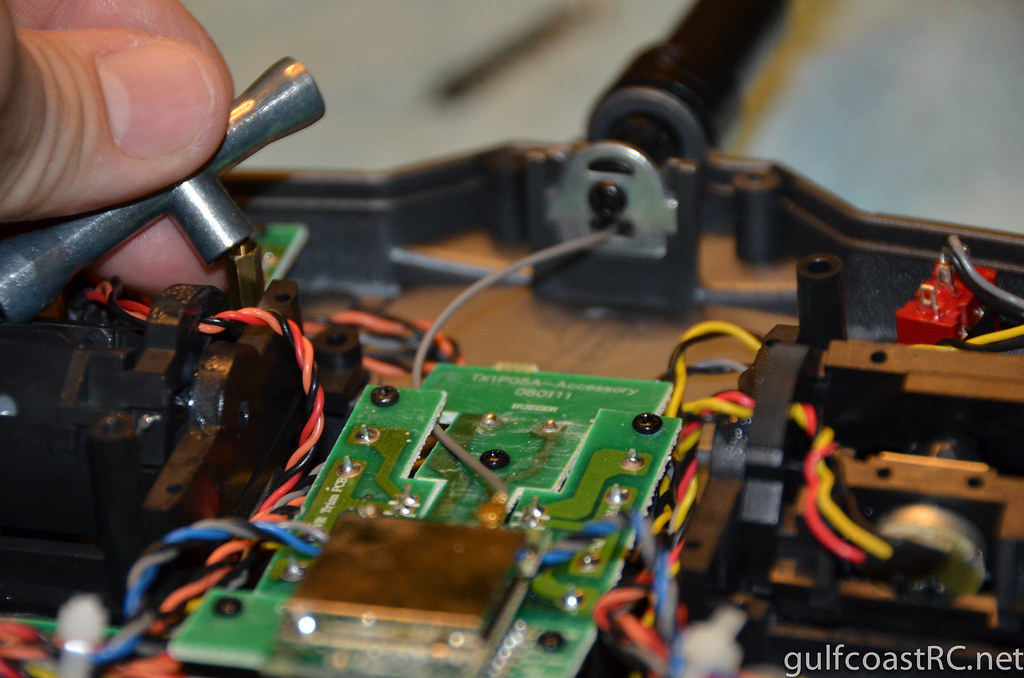
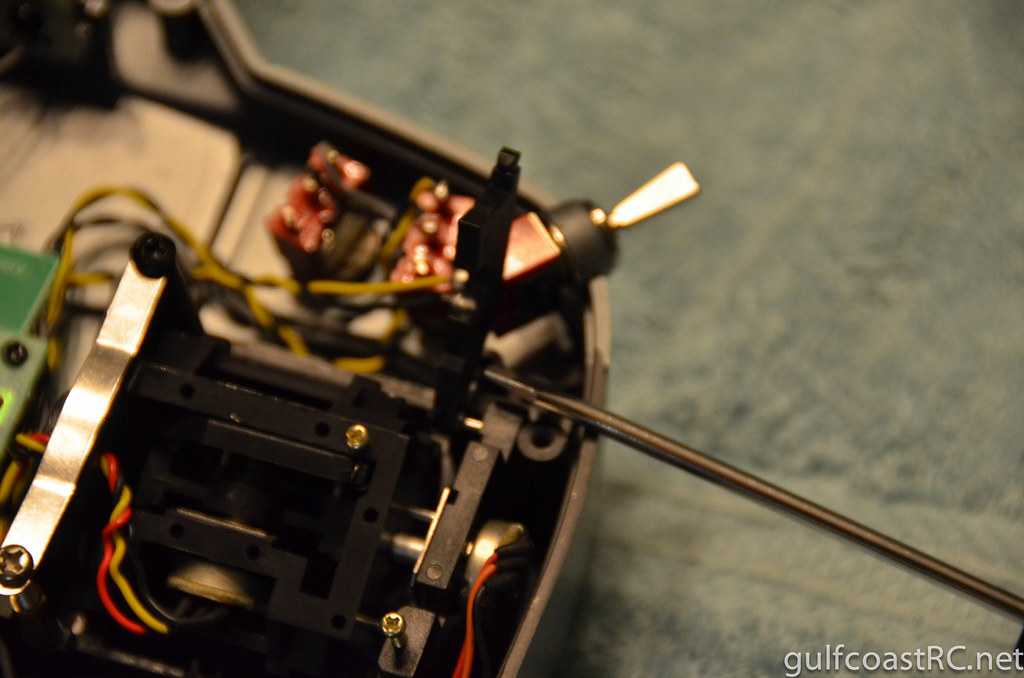
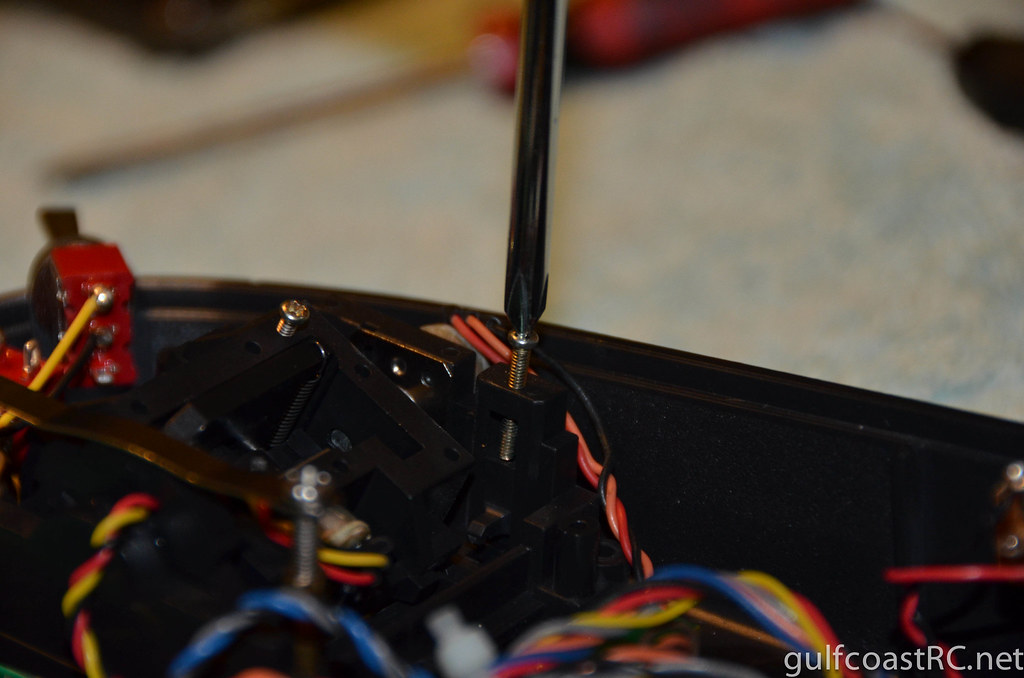
For the next step... See the tool in the photo? That's the wrong tool. Small needle-nose pliers are needed for this step.. I couldn't find mine and suffered at the hands of time because of it. ;)
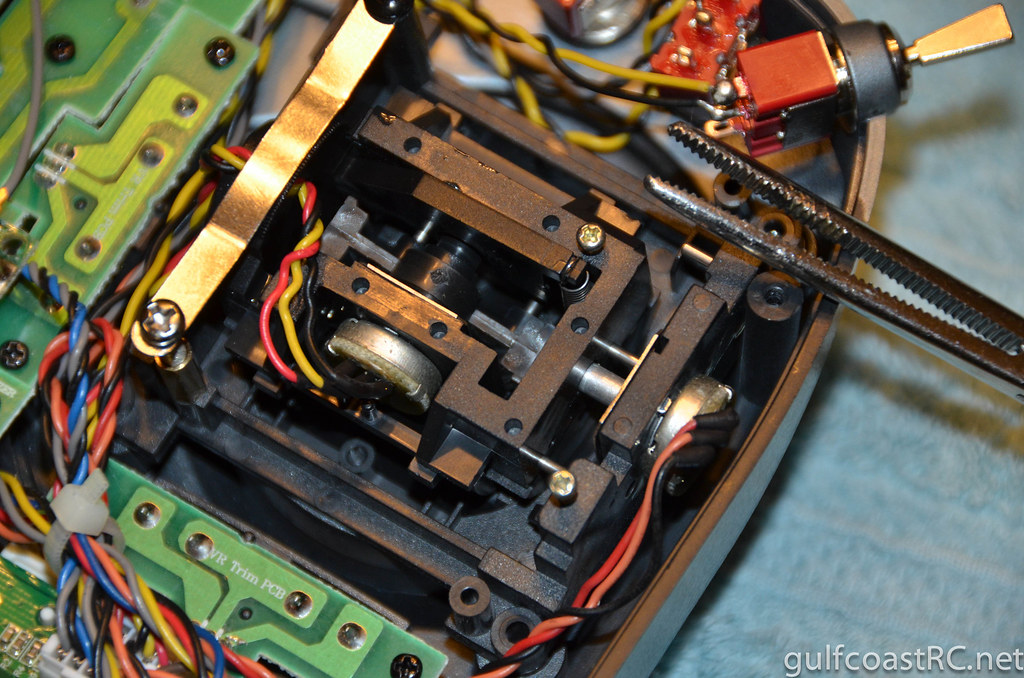
It's a tight space. There are some well-thought-out grooves in the plastic side, that can line up to help remove one of the pins.
..and there's a metal plate blocking one of those grooves whose purpose seems to be just to make this job harder..
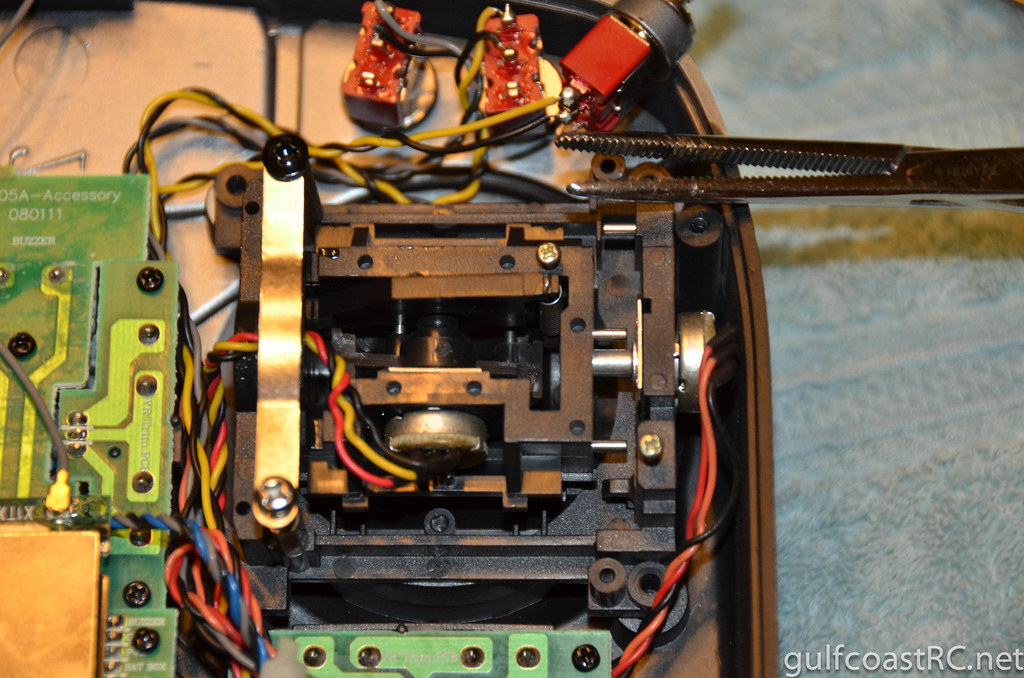
Remove the pins, 1 by 1 and add them to the opposite stick in the same equivalent spots. The hardest one (for me) is the pin right next to the vertical-moving rheostat shaft to the right of the above picture. To get that pin out, and to put the other back in, I literally flexed (gently) the plastic in this area enough to make room for the pin to get in the hole...

Here's the result: all pins back in place. I actually chewed up the plastic a little bit.
One thing, I will recommend. Put a sharpie mark on the rheostat shaft. Then, move the stick up and down to make sure it moves. There is a potential, from bowing the plastic out, to loose the bounding between the plastic and the rheostat shaft.
If your sharpie mark moves with your stick motions consistently, you won't have any problems. If the rheostat shaft doesn't move with the stick movements.. you could easily repair that.
It didn't happen to me.. but if it does... some conservative use of CA or hot glue would solve the problem.
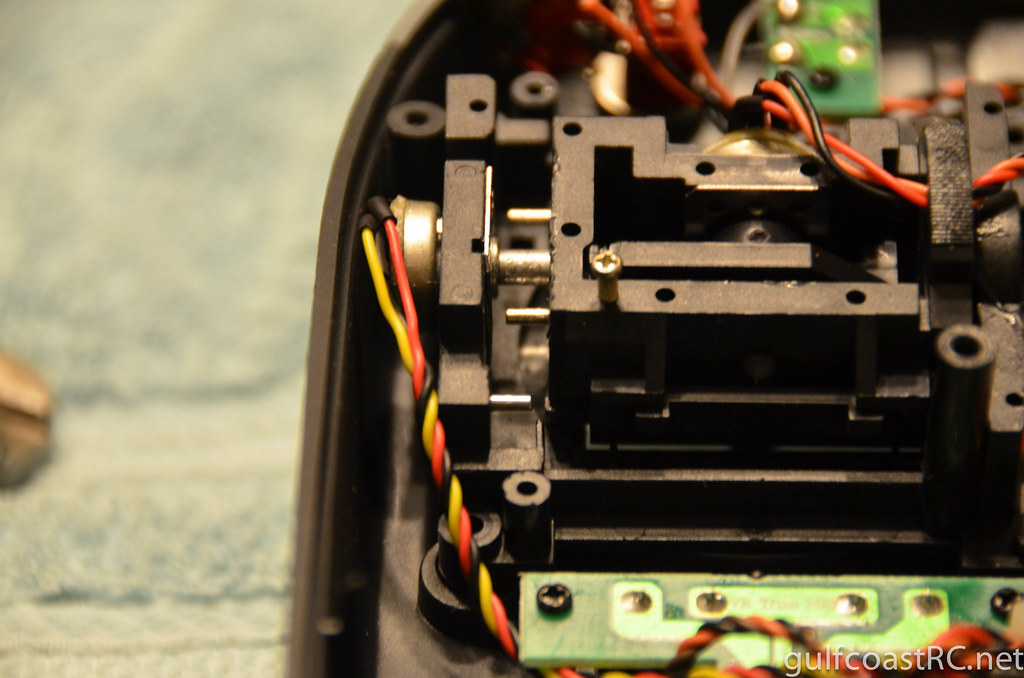
Back to the opposite side, remove the spring tensioner screw that's still installed..
Now, flip the radio over and remove the four screws holding this stick in place (the one you just removed the spring tensioner screw from)
Pull the controls stick out (gently and without over-stressing the wires). There is a plastic plug as shown below. Remove it. Now, using a screwdriver and a little finess, push the plastic spring tensioner out through the hole you just exposed It's tricky but doable. Don't damage or loose the spring tensioner.
Now, that you have the tensioner out.. Set it aside and replace the plug you removed and re-install this stick (and it's screws)
Go to the opposite side, do the same thing, essentially. Remove the stick, remove the plug, install the spring tensioner in the channel beneath the plug, put the plug back and reinstall the stick and it's four screws..
Now, reattach the plastic piece (onto the pin just like when you removed it) and screw in your spring tensioner.
This is a good time to adjust the two tension screws. You only messed with the vertical tension bar and vertical spring tension adjustment on each stick. So your horizontal tensions should be "stock", still. From experience, the amount of tension isn't as important as consistency among the vertical horizontal planes. Adjust the spring tensioner screw you just installed and the tension bar screw you previously installed until vertical movements on the stick feel the same as horizontal movements (tension-wise..)

Carefully re-attach your wires..
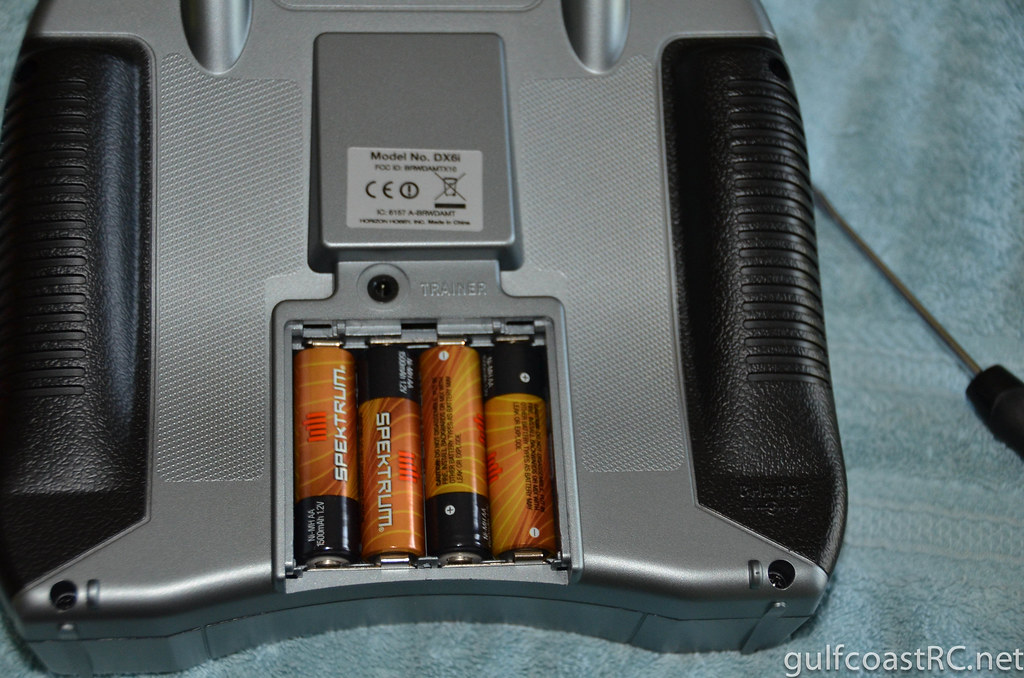
Re-install your batteries..
Now, let's tell your radio about it's new mode.
Go to setup..
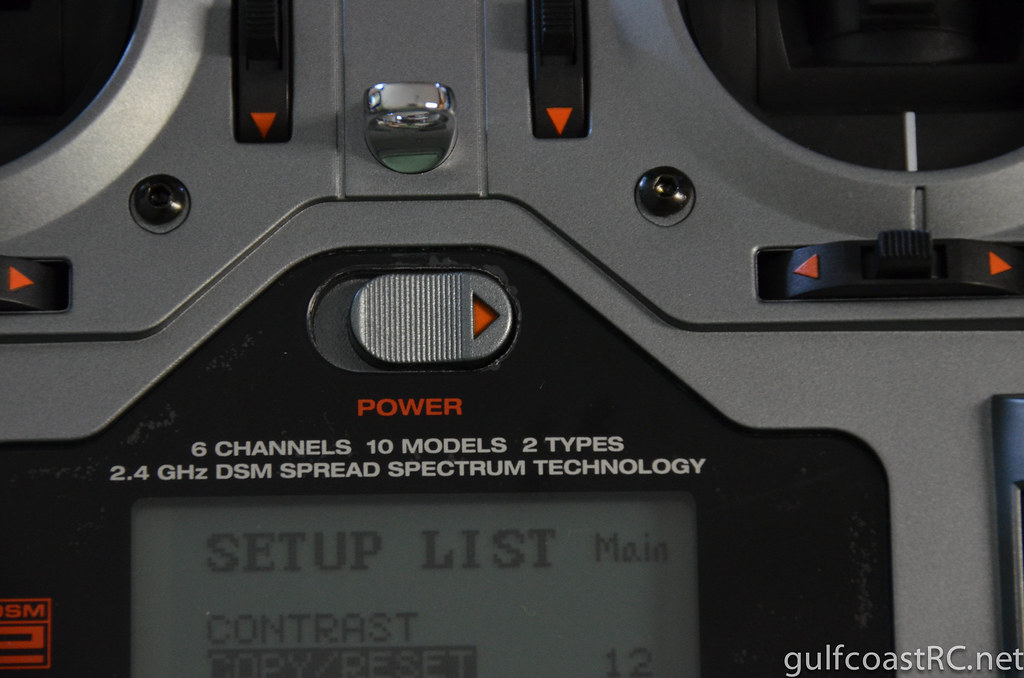
Scroll down to Copy/Reset and choose it with the click wheel.
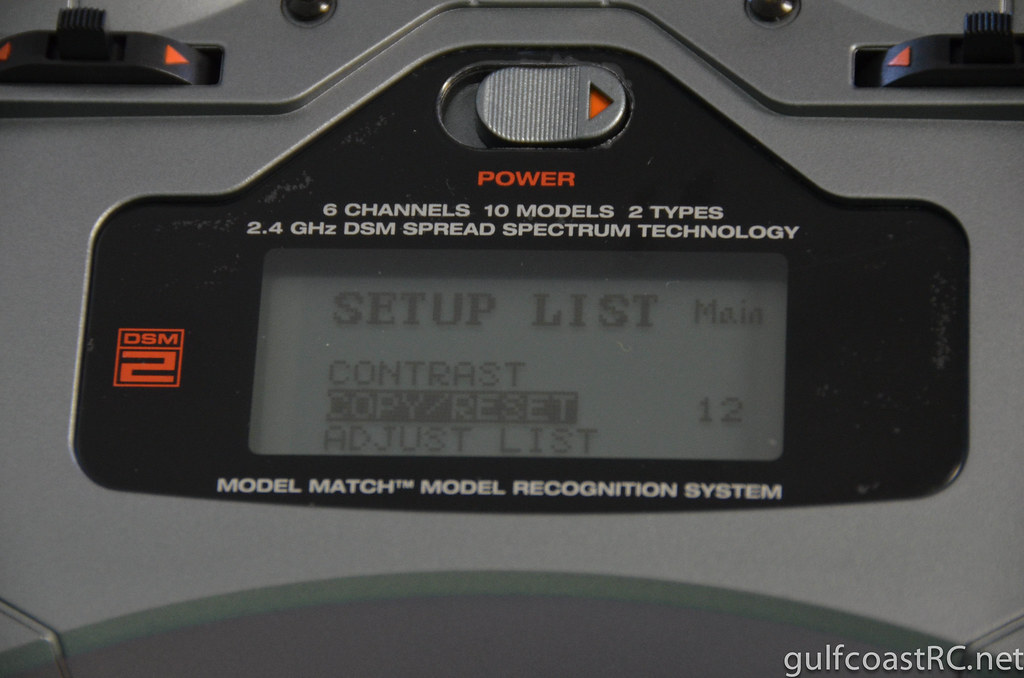
When prompted Sure? -- Move your click wheel (don't click) until List is highlighted (and don't click)...

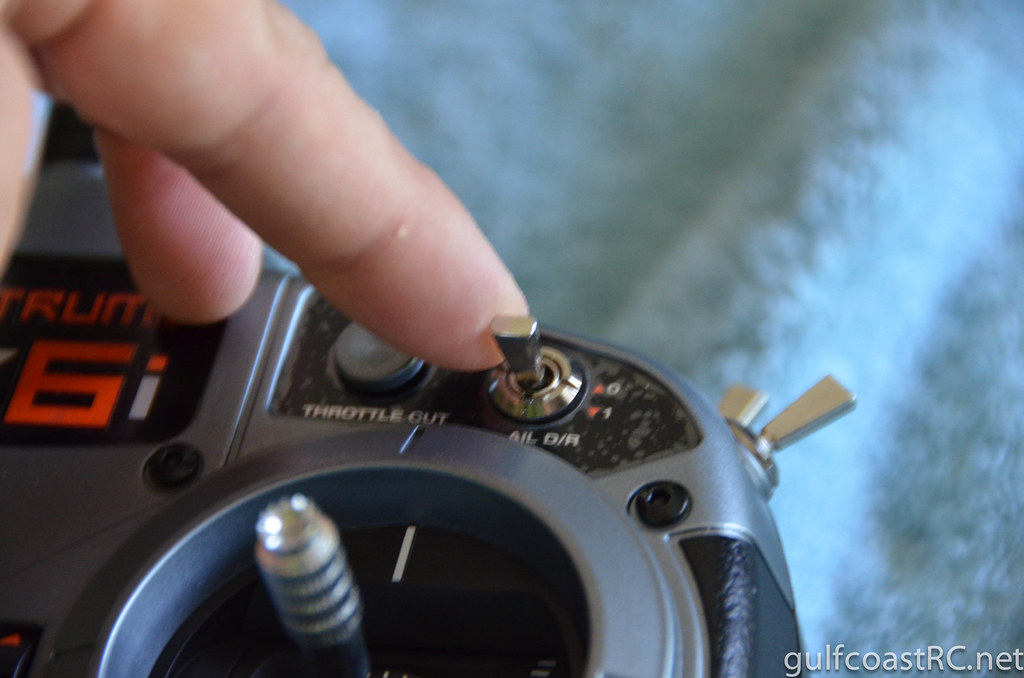
Instead, flip the AIL D/R switch 3 or 4 times..
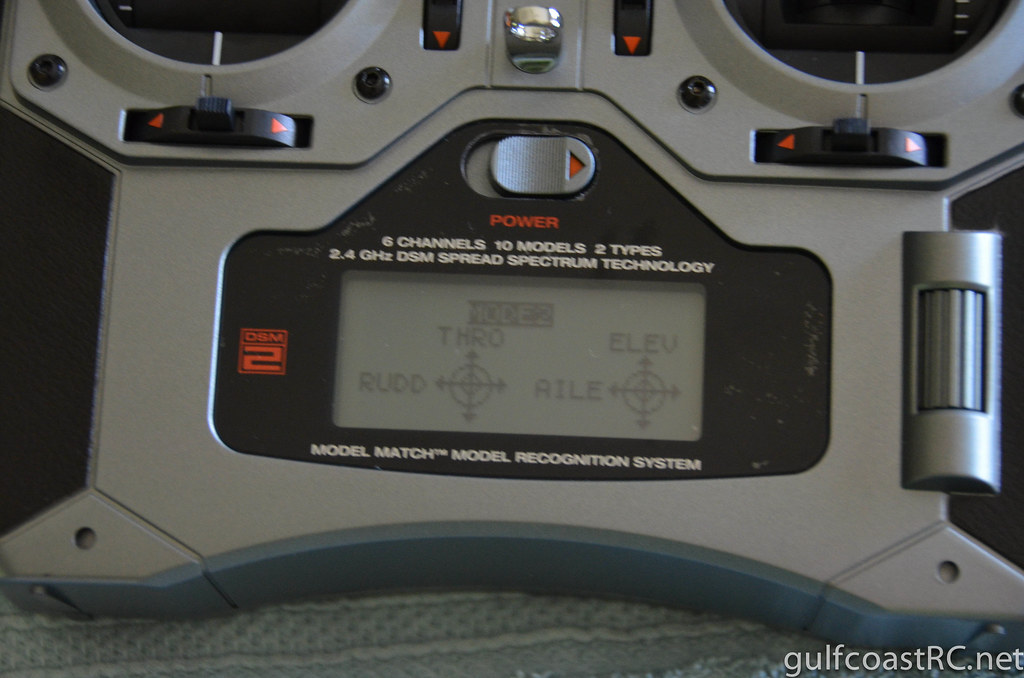
And the radio-ninja menu appears where you can specify the radio mode..

Scrolling the wheel changes the option. Click the wheel to save.
Setting up Flaperons with Spektrum DXi 6 Transmitter
Shown below is the script of the closed captions of a Youtube video which attempts to show how to set up flaperons on my 120 size Zero.

Is there any chance you have a copy of the PDF you used for this? The site is no longer hosting this document and I am in a world of pain with the same situation... mode1 does nto agree with my fingers =(
ReplyDeleteMuch appreciated,
keen RCer
Yes I did not know the info had been removed so I have reproduced it at the bottom of my page.
DeleteThis blog post was absolutely fantastic. Thanks for taking the time to debate this, I feel strongly about it and love learning extra on this topic.spektrum
ReplyDeleteThanks for the comment Dennis! It is always great to get positive feedback.
ReplyDeleteHi David,
ReplyDeleteI actually found it easier to just switch the control stick but switch as well the wires in the 6 pin connector so that you don't get the elevator and throttle going sideways instead of up down.
To switch the wires, you just need to lift with a small screw driver the plastic where you see the little piece of metal on the top and pull the wire, then move them by three on the other side of the connector.
The only drawback is that the wires are different size, so it won't be as neat as the original set-up, even with new cable ties, but it works great, and easy to put back in position if you have a warranty issue.
Sorry I should have take pictures to show... but I let you do the great job...
Hi David,
ReplyDeleteFollowed your steps, no problems including moving the three pins with angles needle node pliers, took all of 25 minutes thanks to your concise instructions. I converted from Mode1 to Mode2.
I've just followed the instructions above and although its done, its working fine, I never want to do that again! Jeez, what a faff!
ReplyDeleteWithout the blog I'd never have managed it - thank you!
Cool and I have a keen offer: Does Renovation Increase House Value house remodel before and after
ReplyDeleteModifying stick mode can enhance control customization.
ReplyDelete